Appium Desktop integration
Inspect your app elements and interact with them on BrowserStack’s real devices using Appium Desktop.
Introduction
Appium Desktop is an open-source app for Mac, Windows, and Linux which gives you the power of the Appium automation server in a flexible UI. It is a combination of a few Appium-related tools:
- A graphical interface for the Appium Server to set options, start/stop the server, see logs, etc. You also don’t need to use Node/NPM to install Appium, as the Node runtime comes bundled with Appium Desktop.
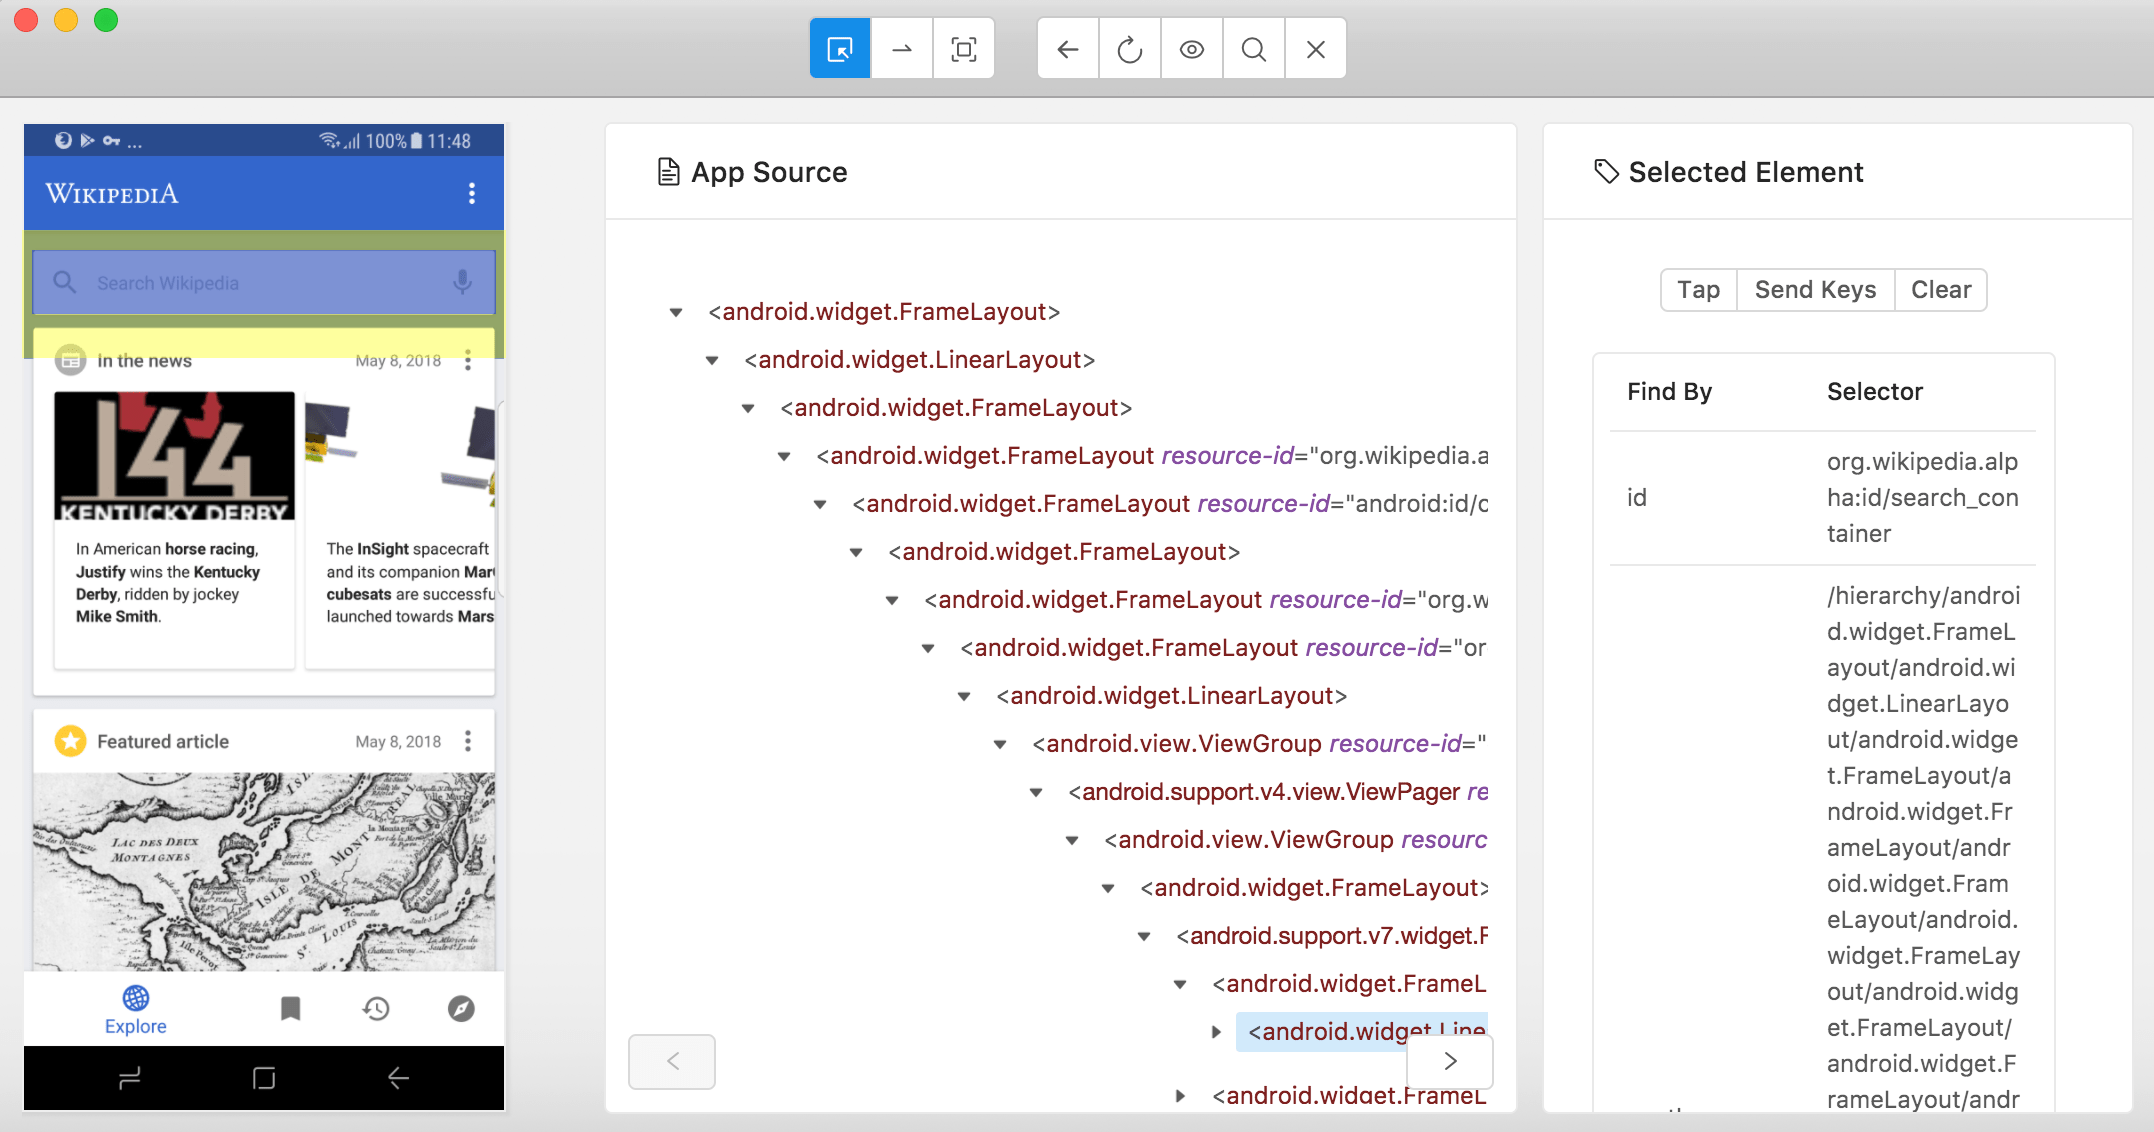
- An Inspector that you can use to look at your app’s elements, get basic information about them, and perform basic interactions with them. This is useful as a way to learn about Appium or as a way to learn about your app so you can write tests for it.
BrowserStack’s integration with Appium Desktop allows you to try the inspector on real Android and iOS devices. Download the latest release of Appium Desktop from the Appium Desktop Github page.
Usage instructions
Follow the steps below to use BrowserStack with Appium Desktop:
Step 1: Upload your app
Upload your Android app (.apk file) or iOS app (.ipa file) to the BrowserStack servers using the REST API. Here is an example cURL request to upload your app using our REST API :
curl -u "YOUR_USERNAME:YOUR_ACCESS_KEY" \
-X POST "https://api-cloud.browserstack.com/app-automate/upload" \
-F "file=@/path/to/app/file/app-debug.apk" \
Here is an example REST API response :
{
    "app_url":"bs://f7c874f21852ba57957a3fdc33f47514288c4ba4",
}
Please note the value of app_url in the REST API response (bs://f7c874f21852b.... in the above example). This value will be used later to set the app capability.
Step 2: Start new session window on Appium Desktop
Follow the instructions on Appium Desktop GitHub page to start a new session window. Select BrowserStack from the list of cloud providers.
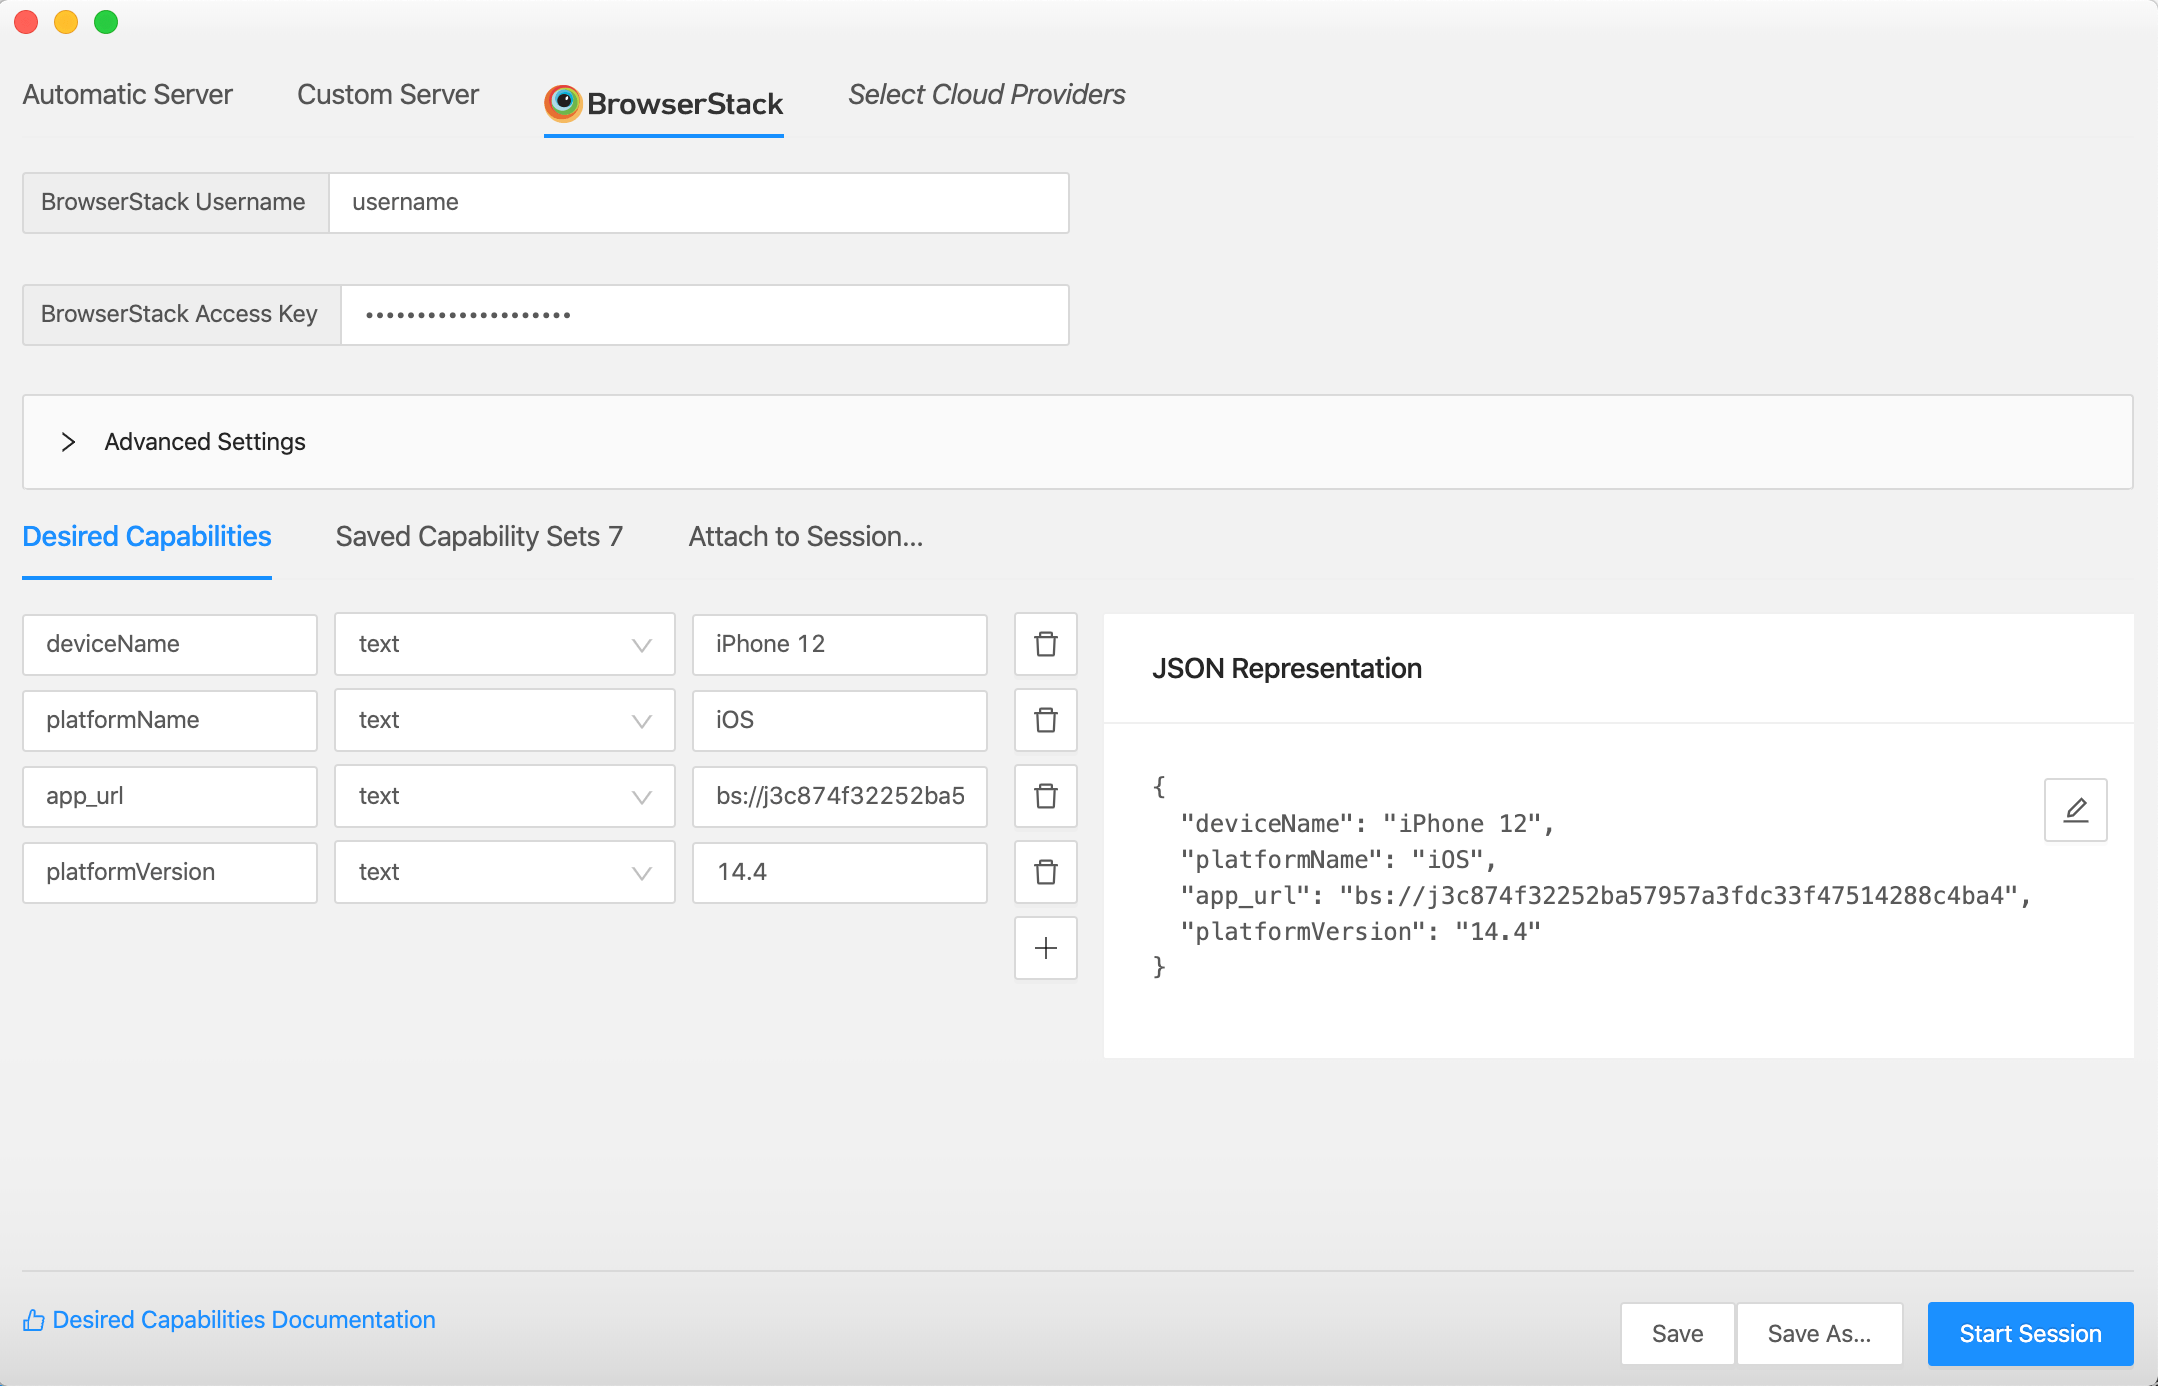
Step 3: Configure BrowserStack credentials on Appium Desktop
On the new session window, enter your BrowserStack username and access key. Obtain these credentials from BrowserStack’s Account Settings page.
Step 4: Configure desired capabilities and start session
Configure BrowserStack capabilities in the Desired Capabilities tab on Appium Desktop. Use the app_url value obtained in step 1 to set the app capability value. You also need to set the device value. Refer to Capabilities reference page for a list of all supported capabilities.
On successful connection with the BrowserStack device, you will be able to inspect elements of your app and record the session using the BrowserStack device on the cloud. You can open the App Automate Dashboard to access test details.
Conclusion
Using Appium Desktop with BrowserStack makes it very convenient for you to inspect your app elements and write the automation tests for your app.
We're sorry to hear that. Please share your feedback so we can do better
Contact our Support team for immediate help while we work on improving our docs.
We're continuously improving our docs. We'd love to know what you liked
Is this page helping you?
 Yes
No
Yes
No
We're sorry to hear that. Please share your feedback so we can do better
Contact our Support team for immediate help while we work on improving our docs.
We're continuously improving our docs. We'd love to know what you liked
Thank you for your valuable feedback!